Start a transcription
After starting the application, the user will find the following screen:
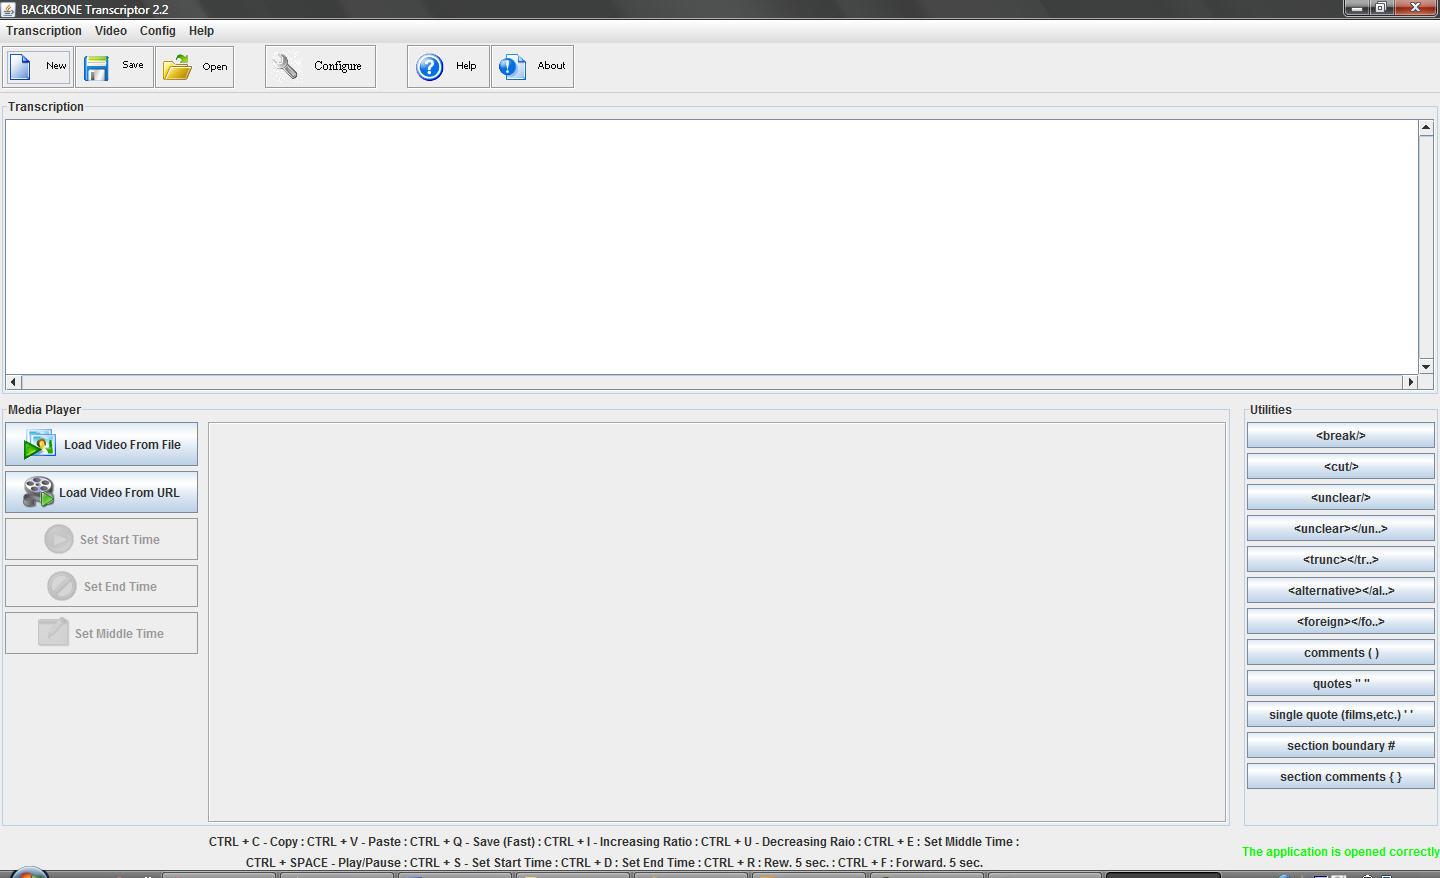
Backbone Transcriptor can be used to tanscribe multimedia files (either video or audio).
These multimedia files can be played back in many different formats such as .avi, .mpeg, .divx, etc.
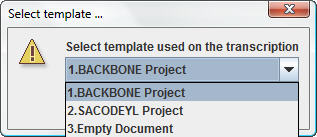
To start a new transcription, click “New" and a dialogue box will prompt the user to select a template which suits the needs of Backbone or SACODEYL transcribers. Users can also select an empty docuement, which will give users the freedom and the power to introduce their own template options.
The Backbone template has the following layout:
Line Content Description 1 [METADATA] # Indicates that the METADATA section begins
2 Title: #Title of the Interview/ text
3 Date Recording: #Date of the Interview Recording yyyy-mm-dd
4 Date Transcription: #Date of the Interview Transcription yyyy-mm-dd
5 Locale: #Where the interview was made
7 Principal Investigator: #Principal investigator
8 Researcher: #Researcher's name
9 Transcriber: #Transcriber's name
10 Editor: #Editor's name
11 Autority: #Autority entity: i.e. BACKBONE
12 ID: # UNIQUE ID for the interview
13 Language: #Language of the Interview(TWO LETTER ID) I.E.(EN)
14 MediaFileName: #UNIQUE NAME of the multimedia file
15 Participants: #Participant (For each participan there are always 1 block (16-21)
16 person: #Id of the participant
17 name: #FULL NAME of the participant
18 role: #Role of the participant in the interview ("interviewer" or "interviewee")
19 sex: #Sex of the participant (M for Male & F for Female)
20 age: #Age of the participant (with digits)
21 Description: #A small description of the participant
22 [/METADATA] #Indicates that the metadata seccion ends
23 [BODY] #The transcription section starts
24 Greta: #An example of the transcription of "Greta person"
25 [/BODY] #The transcription section ends
Now load the video or the audio file from your computer or from an URL:

Note that a number of keyboard shorcuts are available. These are shown at the bottom of the main window.
Text has to be enclosed by the # sign

All the sections in which a text is split need to be enclosed by the # sign. BEFORE the first section there has to be a # sign, otherwise the first section is missing in Backbone Annotator, and there has to be a tag AFTER the last section (otherwise the last section is missing in the Annotator).
Two approaches to transcription
The user can approach the transcription process in, at least, two different ways. As an indication, you can find below two ways in which BACKBONE Transcriptor can be useful. Of course, others are possible. Whatever your approach, don't forget that everything the user transcribes must be within section boundaries. This is essential.
Approach 1: Transcription first, then timestamping
The user transcribes an interview, or any other type of spoken discourse, including no simultaneous multimedia time annotation at all. Once a transcription is finished, timestamping is added to the transcription. To do this, the user will necessarily have to transcribe, or paste if it was transcribed in a different application such as NotePad, the interview inside the [BODY] section, typing before the text the name of the person followed by a colon. An example follows:
Beth: So your hobbies are mainly sports and trekking?
Tom: Yeah. That's right. I'm very much into trekking.
The multimedia time annotation follows the transcription:
First the user places the cursor on the line she wants to timestamp (the first time this will be on the very first line of the BODY section). The user clicks the search bar on the multimedia player and goes straight to the start of the turn, sentence or any other linguistic unit that is on the current line of the transcription.
Now the user clicks Set Start Time.
The user seeks the end of the turn or section and clicks Set End Time.
Repeat the process down the lines.
The user may need to insert timestamping anywhere in a given turn. This can be done by clicking Set Middle Timestamping.
To make sure that the process is correct, a short interaction after the annotation time should have the following aspect:
[3.9960000000000004] [20.108171264000003] Peter: Who are you ?
[31.076263936000004] [47.528402944] Tom: I'm very well, thank you.
You can learn more about configuration options for section or turn timestamping levels here.
Approach 2: Simultaneous transcription and time annotation
The user transcribes spoken discourse including simultaneous multimedia time annotation. The process is as follows:
The user transcribes a line of spoken text.
The user places the cursor on the line he wants to time-stamp.
The user clicks the search bar on the multimedia player and goes straight to the start of the utterance or section that is on the current line of the transcription.
Now click Set Start Time.
The user seeks the end of the utterance on this line and clicks Set End Time.
Repeat the process down the lines.
The user can at any point insert Middle Timestamping by placing the cursor before the stretch of language to timestamp and then Set Middle Timestamping.
If possible, it is preferable to transcribe a speaker's turn only on one line.
After transcription and time annotation, the user needs to SAVE the document. To do this, click Save, name the file and save it to your local disk. BACKBONE Transcriptor includes a Fast Save Facility. Press CTRL + Q. A message will appear confirming the transcription has been saved successfully.
Continuing a transcription
If a user wants to open a transcription which has been left unfinished, she only needs to click Open, select the filename that contains the transcription and follow the normal process of transcription.